


Have you decided you want to buy a 3D printer? If so, the choices can be overwhelming. Fused deposition modeling (FDM) printers are, by far, the most common among beginners because they are inexpensive and easy to find. The printers typically range from $150 and up.
FDM printers use a plastic filament that comes in various materials. Filament prices start around $15 per kilogram. Yes, if you’re getting into 3D printing, you’ll need to get used to using the metric system.
Choosing a Printer
The first step in choosing a printer is deciding whether to go pre-assembled or do-it-yourself. Pre-assembled printers are usually ready to go right out of the box. They require little to no assembly or calibration. The downside to this added convenience is a higher price tag.
The cheapest way to get started in 3D printing, if you are mechanically inclined, is to buy a DIY kit. These kits come completely unassembled and take some time to build. However, building one of these kits can provide you with the best hands-on knowledge of the different parts and what role they play in the overall function of your machine.
Printer Components
Whether you choose to build your printer or buy one fully assembled, there are some common terms you will frequently hear. Understanding what these terms mean will help you assemble, maintain and use your machine. All 3D printers share a few common components: the frame, power supply, stepper motor, extruder motor, build surface and main board.
FDM printers are typically open source and completely upgradeable. The main board is usually some variation of an Arduino with a specific firmware installed. The firmware is also open source, and therefore can be upgraded. The steppers are the motors that control each axis individually. The method of moving each axis can vary from lead screws to pulleys and belts, but the movement is always controlled by a stepper.
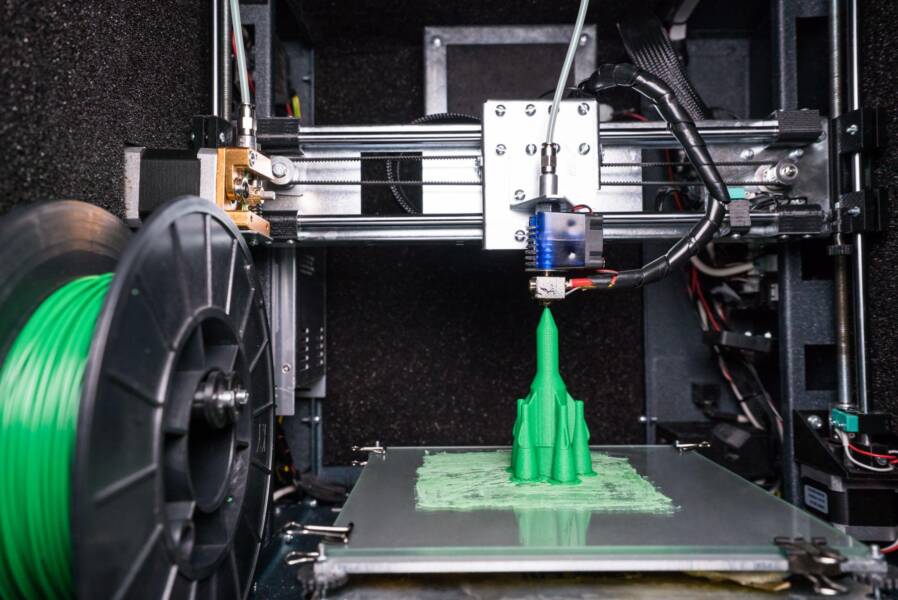
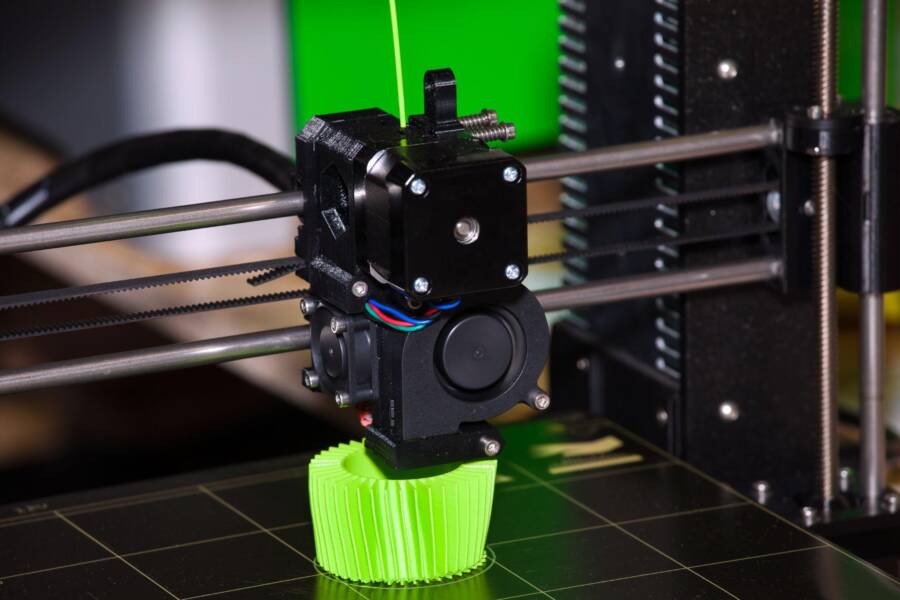
The extruder is another stepper motor that feeds the filament into the hot end, where it melts and is forced through the nozzle and deposited on the build surface. The extruder motor can be direct drive, where it is mounted on the X carriage with the hot end, or it can be mounted remotely with a PTFE (polytetrafluoroethylene or Teflon) tube that guides filament to the hot end, known as a Bowden setup.
The power supply is self-explanatory, as that it delivers power to the components. Finally, the frame holds and supports all the other components. Frame material is an important consideration. It needs to be as rigid as possible to eliminate wobble that could cause imperfections in the print.
Printable Materials
When it comes to filament, there are literally too many types to discuss in this brief overview. Chances are, no matter what you’re planning on using your printer for, there’s a filament for it. There are even filaments filled with other materials, such as wood, ceramic and stainless steel. Some are capable of rusting, conducting electricity or being fired in a kiln.
Filament comes in different diameters, so make sure you are buying the correct diameter for your setup. Environmental factors, such as temperature and humidity, can have adverse effects on certain materials. Your filament of choice may require special storage practices, such as a dry box, to minimize the amount of moisture being absorbed. Every material is different and has its own unique printing requirements and limitations.
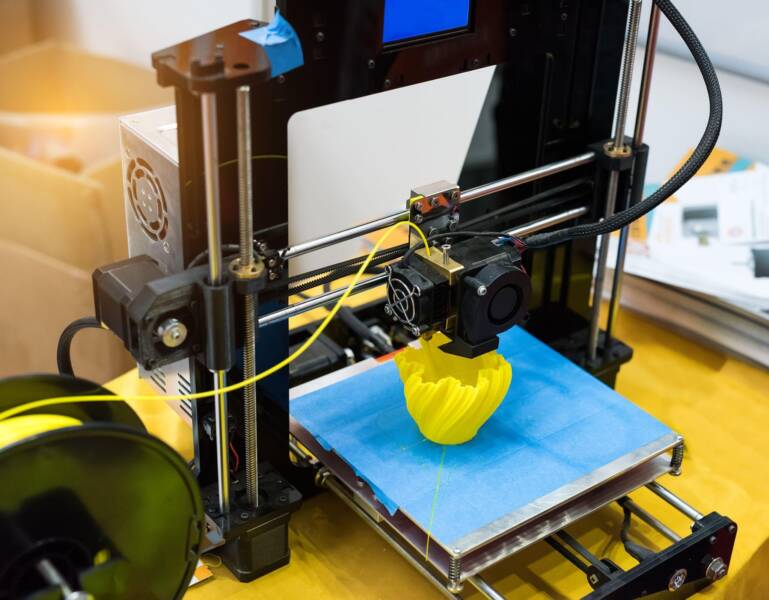
With all the different filament materials available, PLA is the go-to for beginners. It is easy to print, is low cost and also biodegradable. When contemplating costs, keep in mind that by opting to purchase a 3D printer, you’ll be spending significantly more on printer filament than you would with general printer ink.
Build Surfaces
Bed adhesion is crucial to successful prints. Getting the first layer to stick is important, but it’s just as important that the part stays in place throughout the duration of the print. If the part starts to warp at the edges, the nozzle could detach it from the build plate. Once a part has detached from the bed, you’ll need to cancel the print or you’ll end up with something looking more like plastic spaghetti than a finished print.
There are several methods for increasing bed adhesion, with the most common among beginners being blue painters (masking) tape. Painters tape works well, but it needs to be replaced frequently. Applying it perfectly smooth can be a challenge as well. Keep in mind that any imperfections on your build plate will show in your finished print.
Another popular choice is a ready-made build surface such as Buildtak. Buildtak is a high-temperature composite sheet with an adhesive backing. These build surfaces have a special texture to help the part adhere, but the texture could transfer to your part.
The sheets are sold in pre-cut sizes and install with a simple peel and stick. These sheets are far more durable than tape, but they still need to be replaced from time to time.
Borosilicate glass plates are the best build surfaces available. There is no need to worry about lining up tape edges or trying to get a plastic sheet to align perfectly. You can order the glass to match the size of your build plate and clip it on, using mini binder clips. The advantage to having the glass clipped on is that it’s very easy to remove for cleaning. The smooth surface can give your finished part a nearly mirrored finish.
If your part requires a little additional encouragement to properly stick to the glass, you can apply a thin layer of glue. A light coating of hairspray can also be used. If you are printing ABS, scrap ABS can be dissolved in acetone and then brushed on the glass to aid in adhesion.
Calibration
Getting your build plate evenly aligned with the nozzle is a vital part of the process. You’ll need to manually move the nozzle to all four corners of the build plate and use a sheet of A4 paper to adjust the gap between the nozzle and build surface. Adjustments are made using the thumbscrews at the corners of the bed. The paper should move freely with just a slight friction of the nozzle against it, and it should be able to slide under the nozzle without putting pressure on the build plate.
Auto bed leveling features are available, but they may not be the best option for beginners. Depending on your printer, you may have to flash the firmware to something that supports an auto-level feature. Also, tolerances may vary between these sensors. The result may not be as accurate as manually leveling your print surface.
Getting a Design to the Printer
Most 3D printers can print via USB connection to a computer or from a memory card. There are aftermarket add-ons available to connect to your printer wirelessly, and some higher-end 3D printers come with this feature built in.
When you’re ready to print an object, you’ll need slicer software. A slicer will take the STL (stereolithography) file and break it down into layers based on the specified settings. The number of layers is determined by the layer height. Larger layers can reduce print time at the cost of losing detail.
Once you’re satisfied with the settings, you can export as a G-code file. G-code is nothing more than a set of numerical control commands that will tell the 3D printer what to do.
Final Thoughts
If you’re looking to get started in 3D printing, you don’t have to break the bank. If you are tech savvy and enjoy tinkering with things, get yourself a DIY 3D printer kit. You’ll learn more building it yourself than buying one that’s ready to go out-of-the-box. Plus, these machines are completely upgradeable and fun to experiment with.
TechnologyHQ is a platform about business insights, tech, 4IR, digital transformation, AI, Blockchain, Cybersecurity, and social media for businesses.
We manage social media groups with more than 200,000 members with almost 100% engagement.


